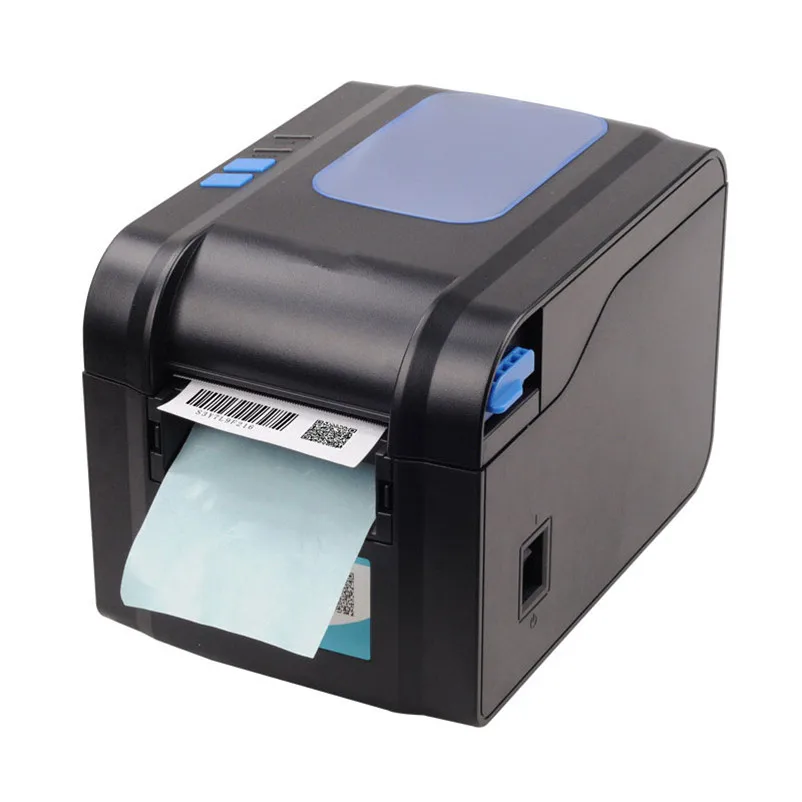
Product parameters:
Print method: Direct thermal line
Resolution: 203DPI
Print speed :Min:50.8mm/s Max:152.4mm/s
Memory: DRAM: 4M FLASH: 4M
print head temperature detection: micro switch
Paper detection: photoelectric sensors
Communication Interface: USB interfaces
Barcode character images: CODE128, EAN128, ITF, CODE39, CODE93, EAN13, EAN13 +2, EAN13 +5, EAN8, EAN8 +2, EAN8 +5, CODABAR, POSTNET, UPC-A, UPCA +2, UPCA +5, UPC-E, UPCE +2, UPC-E +5, CPOST, MSI, MSIC, PLESSEY, ITF14, EAN14,128M,25,25C,39C,39S
Qr code: PDE417 QR_CODE, DATAMATRIX
Graphics: monochrome PCX, BMP and other image files can be downloaded to FLASH, DRAM
Paper Type: thermal roll paper, self-adhesive paper.
Media amplitude: 20mm-82mm
Roll diameter: 100mm maximum
Roll Neijing: minimum 25mm
The paper: tear off
The way of paper: ripped from
Input Buffer: 1024K bytes
NV FLASH 256K bytes
Input: 24V DC, 2.5A
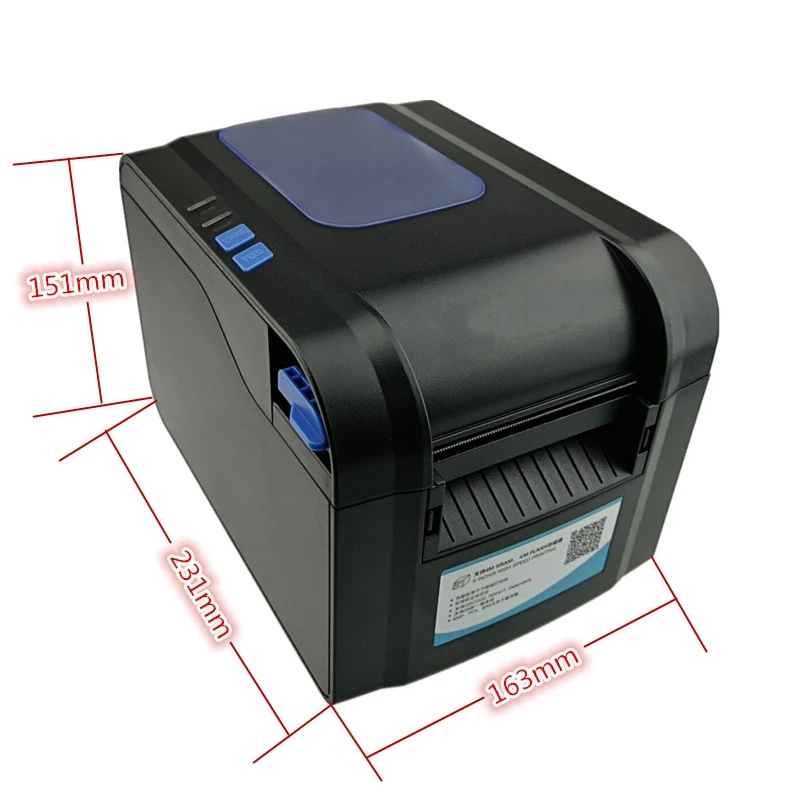
Dimensions: 231 (D) X 163 (W) X 150.7 (H) mm
Weight: 1.5 KG
Operating environment: WIN9X/WIN ME/WIN 2003/WIN 2000/WIN NT/WIN 8/WIN XP/ WIN8.1 / WIN VISTA/WIN 7/WIN 10
print command: compatible with TSC command
Work environment :5-45 degrees
Storage temperature: -40-55 degrees
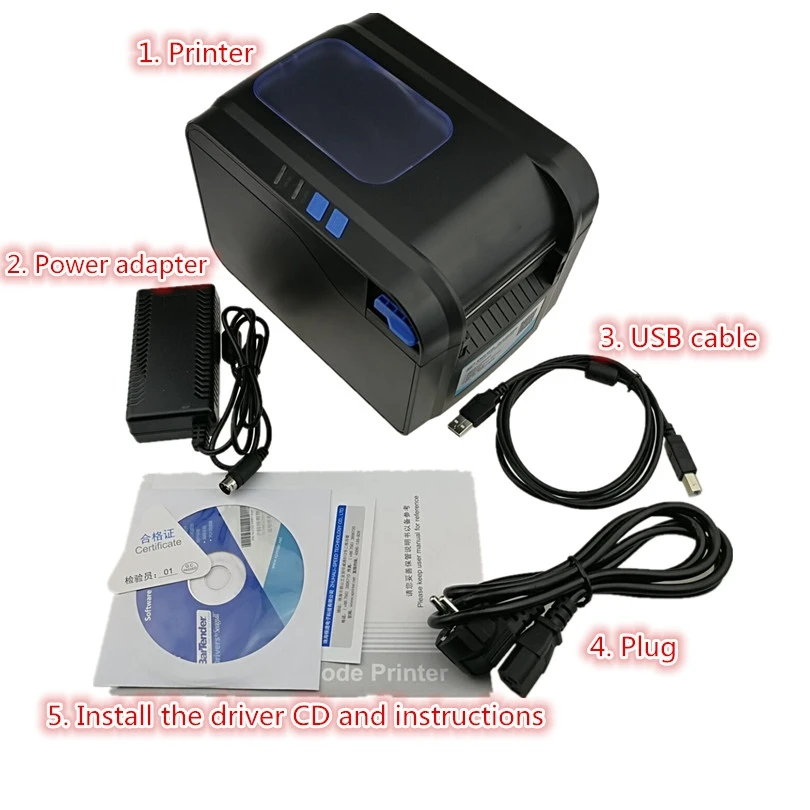
Packing List
1 x printer
1 xPower adapter
1 x USB Data Cable
1 x Power line
1 x Instructions for use
Usage:
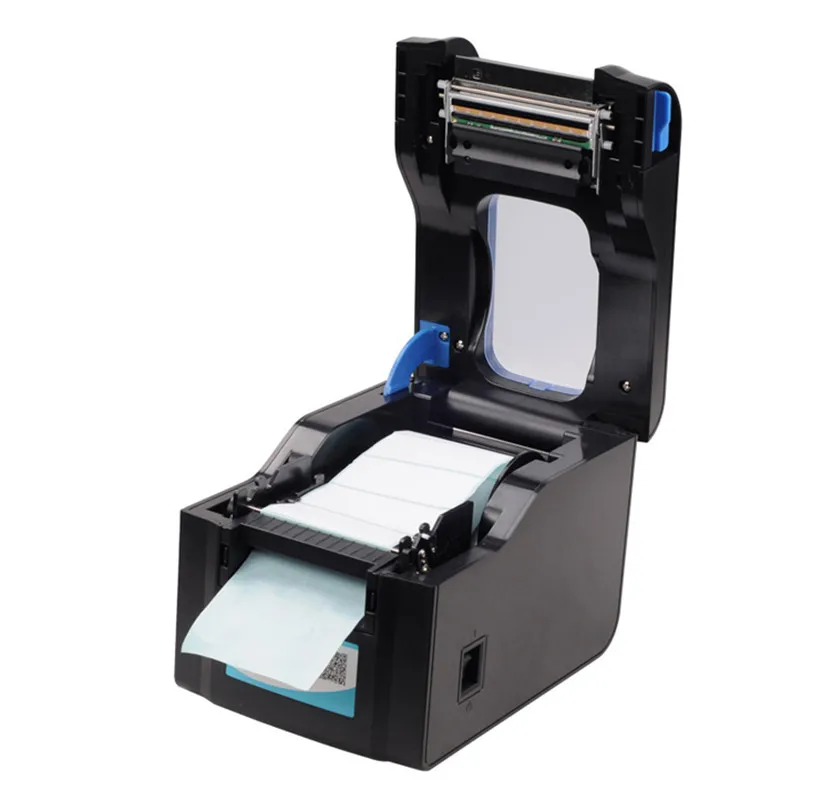
1. Open the lid
2. Place a roll of paper placed in the specified location
3. move the paddle Move to the the left, fixed
4. Pull out A small piece of label paper , Card slot Move to the left


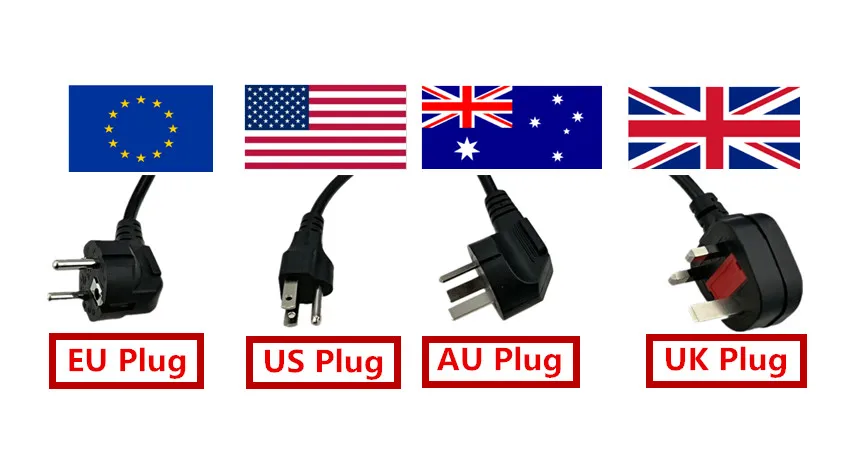
1. The printer 2. Power adapter 3. Plug 4. Install the driver CD and instructions 5. USB cable


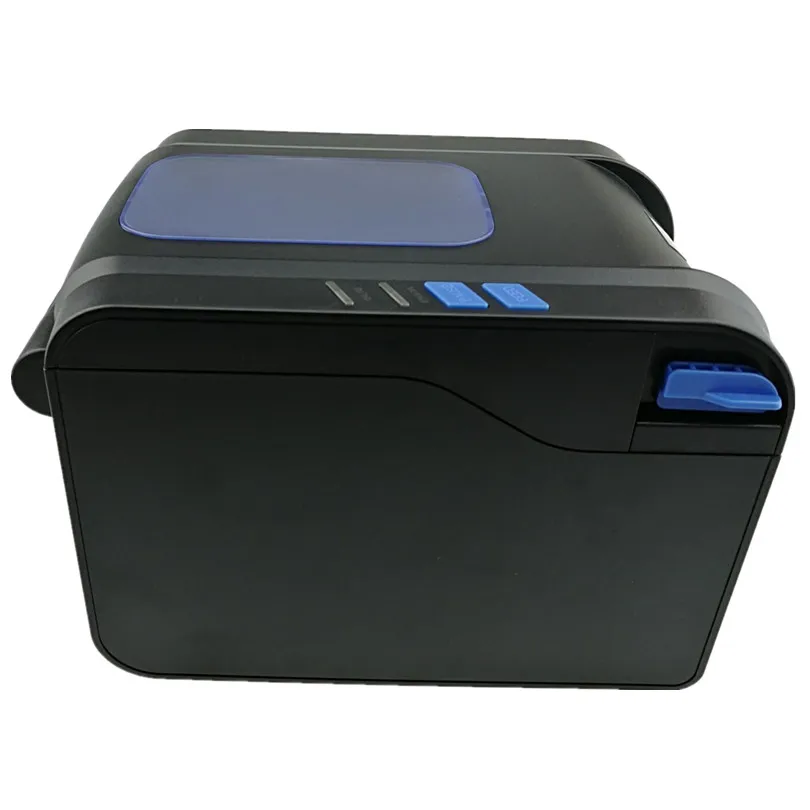
1. USB port 2. Cash drawer port 3. Power port
Ports:
USB interface
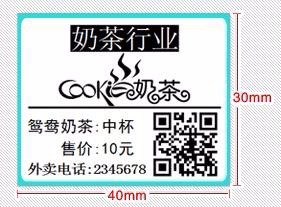
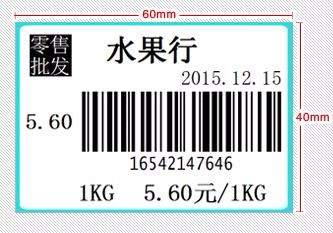
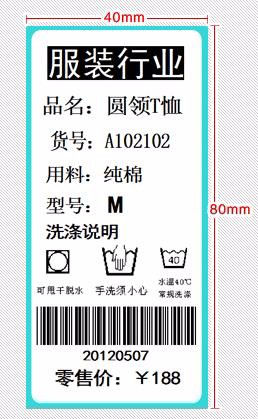
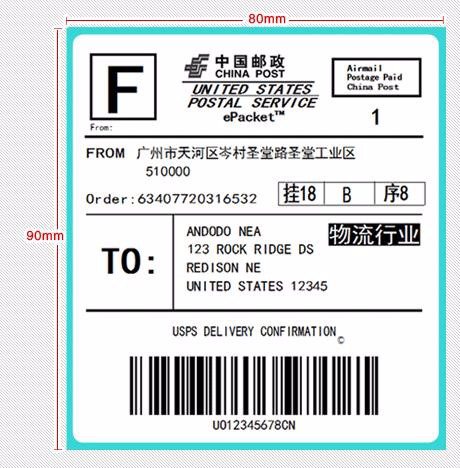
Product range: